Friday, December 21, 2012

Stuffed with Goodness – Vegetarian Calzone

I love everything Italian and of course their food is near the top of that list almost at par with their gorgeous men! Ahhh….amore……..

Pizza, the first thing one thinks of in Italian cuisine has been made world famous thanks to the Italian immigrants that brought it when they came over to the new world. A Calzone is the cousin to the pizza - basically one can describe it as a pizza turnover. The same goodness as in a pizza, just a bit more moist, and a crispier exterior making eating it even more delectable! A crunchy shell with the warm gooey cheesy interior makes this dish a winner all the way! 


You will find a million websites with an equal number of pizza dough recipes that do not really help; as most of them have copy/pasted someone else’s recipe and so most don’t work! After many years of trying the endless quest to find the best dough in my opinion, I found using bread flour makes the best dough (who would have thought)! My recipe calls for ¾ - 1tsp of yeast for every cup of flour. The reason why the amount of yeast is not exact is because if you make this recipe in winter, then you need more yeast and if you live in a warm place like Singapore (1° north of the equator) you need less. I use Prima bread flour, it’s not exactly King Arthur brand of flours, but a pretty good substitute.

Like any homemade pizza maker will tell you, cheese blends are a personal choice. While I was in the US I loved quarto formaggio from Traders Joes, now I use mozzarella, cheddar and add some parmesan for some extra sharpness. The stuffing is also variable, sometimes I like to add ricotta cheese and sometimes I just roast a whole bunch of vegetables on the stove top and add tomato sauce, and cheese. Since we are close to the weekend and I’m running out of vegetables options, I have decided to use eggplant, onion and bell peppers to make todays stuffing.


Eggplant Calzone 

makes 5-6 very healthy sized portions

Ingredients

5 cups bread flour
2 ½ cups water (keep an additional ½ cup, in case dough is ydry)
3 ½ - 5 tsp dry active yeast (about 1 ½ packets of yeast)
2 tsp fresh herb of your choice or 1 tsp dried Italian herbs
2 tsp sugar
1 + 1 tsp salt
1 tsp white pepper powder
¼ cup + 2 tbsp extra virgin olive oil
1 cup prepared tomato sauce
2 cups chopped vegetables
3-4 cloves garlic, peeled and grated
2-3 cups grated cheese
2 tbsp hot sauce

Method

Proof the yeast by allowing it to rise in ½ cup warm water and sugar, it will foam up when ready. Mix flour, salt, herbs and oil and make a sticky dough. Keep aside in a warm place and let it double, punch down and allow to rise again.
 
Heat oven to the hottest setting, mine is a convection oven and the max is 220 (450). Cube eggplant, salt it lightly and allow it to drain in a colander. Heat 2 tbsp olive oil in a pan, add garlic, onion and  cubed eggplant and allow to cook for about 3-5 mins on a low flame. Remove and set aside to cool. Add prepared red sauce, hot sauce, salt, pepper and mix.
In the meanwhile, after the second rise, divide dough to make into 5-6 equal sized balls. Roll balls into 8-10 inch disks. Spoon in 2-4 tbsp of stuffing mix, add 2-4 tbsp shredded cheese onto one half of the rolled base, fold to create a semicircle. Using the fork tines, press down on the edges of the calzone to seal. Make sure the edges are well sealed otherwise the cheese will leak out. On the top of the calzone make a ½ inch slit with a knife to prevent the calzone from ballooning in the oven.
 
Cook for 12-15 mins until the outer shell is golden brown. Remove and allow the calzone to cool for about 10-15 mins before serving, so the insides have a chance to cool down.

Wednesday, October 24, 2012

Chilli Forecast- Green chili thokku / relish

With the weather cooling down, I thought it would be a good idea to post a much loved recipe for a HOT chilli spread/relish.

I use the recipe for Green ChilliesThokku from the book titled Cook & See by S.Meenakshi Ammal. This book is an important part of the "dowry" that a South Indian Iyer bride takes with her to her new home. My mother still has her dogeared copy and I too have one.


The beauty of this preserve or relish is you can choose how hot you want it depending on the pepper you choose! Sometimes I like using Anaheims and sometimes Jalapeños...so it is up to you. Bell peppers also are a good choice if you want it to be very mild, just cook the peppers a bit longer to make it as dry as possible.

Uses of the relish are so many, I spread it with cream cheese on my panini sandwich or on my bagel! I heat a slab of Haloumi cheese and spread some on top and have it with a salad...yumyum! I eat it along with roti or nan, or the traditional way of yoghurt rice and thokku.


Ingredients
1 lbs or 1/2 kg green chilli or peppers of your choice, stalked, rinsed, dried and chopped
1/4 cup skinned black gram/urad dal
2 tsp + 1 tsp mustard seeds
1 tbsp Tamarind paste
1/3 cup sesame oil ( not the dark Chinese variety, but the light colored ones found in Indian stores)
2 tbsp jaggery/brown sugar
1 tsp asafoetida/hing powder
Salt to taste

Method
Heat half the oil, add hing and skinned black gram dal until a pale reddish color, remove with a slotted spoon and set aside. In the same pan add more oil if necessary an add green chillies and cook for a few minutes, until the chillies do not have much moisture.

Grind to a paste the dal, tamarind, salt and jaggery adding a little water, just until a smooth thick paste. Add chillies and grind to a coarse paste. 

Heat remaining oil, add 1 tsp musturd seeds and add the ground paste. Cook until the paste forms a ball or does not stick to the side of the pan.
____________________________________________________
This recipe has been submitted for the event, Bon Vivant #9  hosted by Sumedha of Sumee's Culinary Bites.

Tuesday, May 1, 2012

Not just for the birds: Bajre ki roti


They say birds know what's good for them!

I knew Millet (bajra – hindi) to be the main ingredient in birdseed, however I did not know that it is one of the earliest cultivated grains. Millet is widely consumed in the Indian subcontinent and used in African and Eastern European cuisine as well. Millet is one of the least allergenic, non-glutinous grains available that is also very high in protein.

As a member the so-called “pseudograins”, (quinoa, buckwheat, amaranth, and teff are actually seeds) millet might just be one of the most versatile of those “grains”. Millet has a nutty/earthy taste, and when it is hulled it can be used in making pulao, when pressure cooked or slow cooked one can make a Konji/Kanji/Soup, which would be great for breakfast or stirred raw into baked goods for an extra crunch, sprouted for salads, ground into flour, or popped like popcorn. Thirty five grams of bajra contains approx 4gms of protein, great for the vegan/vegetarian diet.

Better late than never, I‘ve started to consume millet regularly in my diet. I eat it pressure cooked as a substitute for rice (beware - it has a VERY chewy texture), but I like it! I also make roti’s- Indian breads with it, since others in my family are not so gung ho about it I make the rotis with equal portions of Bajra flour and whole wheat flour. I’ve found after many tries that the bread is best consumed fresh and the flavor is enhanced when eaten with raw sliced onions, blistered green chilli/salt or a powder of peanut, coconut, garlic and dry red chillies. Apparently this is how the peasants in India consume the rotis, which also go by the name Bhakri roti and thecha or lahsun chutney.

Millet flour roti
Ingredients
2 cups freshly milled millet flour
2 cups whole wheat flour (atta)
1 medium onion, finely chopped
1-2 green chillies, finely chopped
3 tbsp fresh coriander leaves, finely chopped
3-4 cups warm water
4 tbsp oil
Salt to taste

Method
Mix both the millet and wheat flours. Add salt, onions, chillies, coriander leaves and 1 tbsp of the oil and rub into the flour mixture. Make a well and pour 2-3 cups of water and knead the dough for about 3-5 minutes or until the dough forms a ball and leaves the side of the bowl. Set aside. Meanwhile heat an iron griddle.

Make lemon sized balls of the dough and roll on wooden board with a rolling pin into the size of a quarter plate (6-7 inchs). The roti should be atleast 3-4mm thick, if you roll the roti too thin it will break while cooking. Using a fork make dimpled impressions all over  the roti and on both sides so that it will cook fast and evenly.

Once the griddle is hot slap the roti on and allow it to cook for 45 seconds and flip over and cook another 30 seconds. Apply a little bit of the reserved oil on each side and cook until light brown spots appear. It is important to cook the bread fast or it will become dry.

Serve warm with butter, sliced raw onion and pickle (see recipes below).


Roasted green chilli: Stick a green chilli on a skewer and roast on an open flame until it blisters. Serve it with salt. To eat, mash the chilli and salt together and apply on the roti.


Lahsun chutney 
(dry garlic/coconut/peanut powder)
Ingredients
100 gms dry roasted skinned peanuts
100 gms grated dry coconut
20-30 garlic cloves
1 tsp cumin powder
2 tbsp red chilli powder
1 tbsp salt
1 tsp sugar

Method
Pound all ingredients together in a mortar and pestle or gently blend in a food processor until a coarse powder is formed.   

Monday, February 20, 2012

It's all Maya

More than a decade ago we lived in Singapore and our wonderful neighbor, Mrs Khera had a very talented Nepalese cook – Maya. She let me in on a few cooking tricks to some wonderful Nepalese dishes, the most important being the Momo. Maya also introduced me to vegetarian Nepalese cuisine which is unusually very simple and subtle in flavor. The dishes are prepared using common flavoring ingredients and spices - like garlic, ginger, cumin, coriander, turmeric, fresh red chilies, onions, cilantro and scallions.

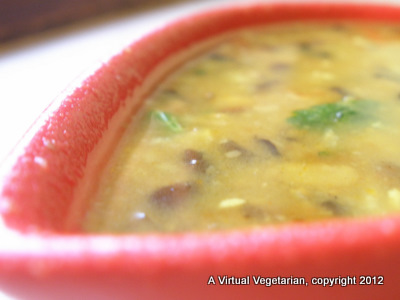
I often make a nepali Kali maa ki dal / urad dal that Maya taught me which is always a hit and a recipe that is most often requested from dinner guests, as this dal does not use cream but still has a creamy texture and tons of flavor. For people who do not care for kali maa ki dal, this is a good variation.


Kali ma ki dal Nepali style

Ingredients
¼ cup split urad dal with skin
¼ cup skinless urad dal
½ cup channa dal, mix and wash all dals and pre-soak for ½ an hour
½ tsp turmeric powder
1 + 2 tbsp oil
1 tbsp ghee
½ tsp jeera/cumin
4-6 fresh curry leaves (optional)
8-10 cloves garlic – approx ¼ cup, grated
1 large very ripe tomato, finely chopped
1 tsp ginger, grated
¼ cup fresh coriander, chopped
1 -2 fresh red chillies split down the center, salt to taste

Method

Pressure cook the dals along with a tbsp oil and turmeric for 20 minutes or on a medium flame in a heavy bottom pan until the dals are well cooked – whisk dals with an egg beater when still hot and keep aside (very important step).
One can also cook the dals in a crock pot for 2-4 hours until the dals disintegrate (well cooked) and has an almost gelatinous texture.

Heat remaining oil and ghee in a pan, add the cumin and allow it to sputter. Throw in the grated garlic and curry leaves and cook for a minute, then add the tomatoes. Cook on low flame until pulpy. Add the cooked and whisked dal, salt and some water. Allow to simmer for 10 minutes, add the ginger, red chillies and coriander leaves.

Serve hot with whole grain bread, nan/chapati or steamed basmati rice.

__________________________________________________
This recipe has been submitted for the event, Flavors of: Nepal created by Nayna of Simply food and hosted by Nupur of UK Rasoi.

Thursday, February 2, 2012

Open Sesame - A master key

In my kitchen I tend to keep certain spice blends and pastes which work as building blocks to a variety of dishes, one such paste is a blend of fresh red chillies, shallots, garlic and sesame.

The beauty of this paste is that it can stand alone as a chutney/spread for breads, diluted with a couple of tablespoons of sesame oil or sour cream it can be used as dipping sauce for vegetables or pita wedges. I also use it a base flavouring for making Indian Chinese dishes like Manchurian or Szechuan / Sichuan sauce or Hot and sour soup. It works exceptionally well to flavour a Laksa soup or Mee Goreng. I add it to the potato stuffing for making Aloo or mixed vegetable parathas or throw in a spoon or two of the paste to fresh yoghurt to make a raita. I add the paste to zing up my fajitas or as a base for Indian style paneer pizza………….as you can see this paste is like a chameleon – it blends in well with many a dish!

I tend to make double batches and freeze the paste in multiple little baby food size jars so that I can thaw out a jar or two as and when I need it. The paste does not use oil or have chemical preservatives, so it may not last more than a week in the refridgerator (but a mini jar has never lasted that long). However, if you want to extend the life of the paste add oil that has been heated to a smoking point and cooled to the paste, additionally you may add citric acid crystals to increase its life, but it adds to much of a sour taste to the paste which can leave a bitter after taste when heated.

This paste is fiery, so use it judiciously.


Red Chilli Sesame Paste


Ingredients3-4 oz/100 gms fresh red chillies, chopped
½ cup shallots, roughly chopped
¼ cup peeled garlic, chopped
2 tbsp white sesame seeds, lightly toasted
Juice of 1-2 limes/lemons
Salt to taste


MethodLightly toast sesame seeds and allow to cool (sesame will sputter out of the pan if the flame is high). Chop red chillies, de-seed if you want the paste to be milder (wear a glove while doing this) and roughly chop shallots and garlic. Blend together chillies, garlic, shallots and sesame to a smooth paste using little water. Add the lime juice and salt.
If you want to prolong the life of the paste add 4 oz of heated and cooled oil (any oil – vegetable, peanut or sesame).

_________________________________________________

This recipe has been submitted for the event, Cooking with Whole Foods [CWF] : Sesame seeds created by Kiran of Sumadhura and hosted by Revathi of Kaarasaaram.

Monday, May 16, 2011

Popeye was right……….Spinach is good for you

Popeye the comic strip character - got instant boost of power/energy from eating cans and cans of spinach when he needed to duke it out with Brutus or other sailormen, or just to deal with grandma or his “girlfriend” Olive oyl.

The truth is that spinach has loads of iron thus making it an energized food {more hemoglobin content in your blood means more oxygen delivered to your vital organs}. So in other words I need to help myself to some serious amounts of greens to help me better cope with my life….………read on!

Just in case any of you are interested, {I know writing this blog is like I am starring in my own movie that NO one is watching} I’d like to blame two things for my lack of blogging {though there are more than enough excuses to pass the blame onto - I’ll stick to just a few to make this post short}.


1. Lack of sufficient/efficient household help, yup its true. As the beloved said, R you’ve had it good for a while now so don’t complain………….alas the cook and full time help are long gone and poor ole me has to do most of the domestic chores! Unfortunately cooking food, photographing the dish and then blogging about it does not make it on my “top 50” list of things to do for the day.

2. My new found love for Dish network {satellite TV} – the package we{I} bought {includes everything but the kitchen sink} and they feature channels in “popular” regional Indian languages like Marathi, Gujarati and Odiya {formerly Oriya} and all these channels have daily soaps, news, and yes EVEN musical reality shows – a MUST watch for me! So as you can see there is very little time left in the day to do the other 48 or so things on my daily chores list!

So enough of the lame excuses and back to Spinach - which can be boring……..but this version of Palak Paneer: Cottage cheese cubes in spiced spinach puree, courtesy my sis R is always a hit. Just a bit of FYI, the afore mentioned sis does not like to cook and rarely does, so acquiring this/a recipe from her makes it even more interesting!


Palak Paneer
Ingredients
2 bags or bunches of spinach leaves, washed and chopped
8-10 oz of paneer, queso fresco, panela, or halloumi, cubed and {shallow fried - optional}
1 medium onion or a handful of shallots finely chopped
2-3 cloves of garlic
½ inch knob of ginger, peeled
1 large ripe tomato, chopped
2 green chillies
1 cup milk or 2-4 tbsp cream
1 tbsp ghee/butter or oil
Salt to taste


Spice Blend: Lightly roast and powder


2 tbsp coriander seeds
1 tsp cumin seeds
1 inch piece of cinnamon
4-6 cloves
1 tsp black pepper
2-4 pods cardamom


Method
Cook leaves with 2-4 tbsp of water and allow it to cool. Liquidize the cooked spinach, fresh garlic, ginger, chopped tomato, and green chillies. Heat ghee/butter/oil in a large pan and add the chopped onions and allow it to brown. Add the spinach puree, salt and cook on low heat for 10 mins. Add the paneer/cheese cubes, milk/cream, and the spice blend. Allow it to cook for another 5 mins. Serve warm with chappati/bread or cooked rice.
____________________________________________________
This recipe has been submitted for the event, Veggie/Fruit a month created by Priya M of Mharo Rajathan and hosted by Reshmi of Rasoi.

Monday, January 24, 2011

Going for the Gold

It’s been a while since I entered the kitchen – thanks to my excellent cook Baby Mami {tamil language word for Aunt} who whips up finger licking amazing traditional south indian fare, but this past weekend there was cooking competition at the Mylapore Club, of which we are brand spanking new members. The club is very quaint, has an old world charm to it and located on sprawling grounds like an oasis in the middle of hectic suburbia.

The theme of the competition was wheat and my son egged me on to participate. He suggested I make Pasta with olives { his two most favourite ingredients} and I accepted. I’ve never taken part in a cooking competition, but figured it was worth a try and that it would at the very least make the Sunday dinner a little more exciting as Baby Mami has Sundays off!

Based on the son’s request and the clubs guidelines I decided to make my vegetarian version of Pasta Puttanesca and load it with tons of olives and fresh vegetables like broccoli and zucchini. While at it I figured I’d make some interesting garnish to “dress” up the humble pasta and made palm trees with bell pepper and carrots - quirky, but adorable!


The competition had at the very least 18-2O competitors and was broken down into two categories - Sweet and Savoury. Some interesting dishes were “old fashioned” wheat halwa, ragi and wheat laddus, wheat flour polis and kottu parrotah – a very native Chennai quick eats dish made of chopped up roti’s and tossed with sautéed onions, garlic, ginger and assorted spices.

The judge of the competition was a nutritionist from a local hospital and had some wonderful comments about the theme in regards to its nutritional value and how we could incorporate more wheat in our mainly rice based south indian diets.

After announcing the 1st, 2nd and 3rd place winners in the sweet category..........drum roll please, they announced Moi as the 1st place winner in the Savoury category! I’ve never really won too many things, excepting for the time I was Ms January in a yearly calender {I'll save that story for some other time} so this was a pleasant surprise and even more so as my son had declared me the winner even before I started to cook! However the son has such a persuasive nature that it is possible that he could have coerced the judge into declaring me the winner………..wink…wink! But the judges comments made me really proud as she said my pasta was the most *attractive dish* and it tasted even better than its looks! A few other things she mentioned was that since I choose to parboil the vegetables and cooked the sauce in olive oil, it added to the nutritional value, thus making it a winner…………..woohoo!

Without further ado, here is the recipe…………

Pasta Puttanesca
Ingredients
500 gms uncooked pasta of your choice {I used rigatini}, cooked until al dente
250 gms broccoli cut into small florets\
150 gms zucchini/squash, chopped into small fingers
6-8 peeled and finely chopped garlic cloves
1 medium onion, finely chopped
3 {100 ml each} cartons of tomato puree
3 tbsp sliced black olives
2-3 tbsp pasta/Italian seasoning
2 tbsp red pepper/chilli flakes
1-2 tbsp chopped parsley
1 tbsp sugar
2-3 tbsp olive oil
Salt and pepper to taste

Method
Parboil broccoli and zucchini. Heat oil in pan and add the garlic and onions, sauté until the garlic and onions give out a fragrance. Add the seasoning, 1 tbsp chilli flakes, salt & pepper, stir for a minute and the tomato puree. Cook until the sauce reduces to 2/3 of its original volume. Add the parsley, vegetables and cooked pasta and toss for a few minutes until the pasta is coated well with the sauce. Garnish with olives and pepper flakes, serve warm with your favourite bread.

__________________________________________________

This recipe has been submitted for the event, Create and Carve, created by Nayna and hosted by Nina of Givemesomespice.


Recipe has also been submitted for the event Presto Pasta Nights, created by Ruth of Once upon a feast and hosted by Jen of Taste of Home.